Popular Posts

Tuesday 26 January 2016

Waistcoat to hood snood

I had a bit of trouble figuring out what to do with today's refashion. The garment in question came in a pile of stuff that my lovely sister-in-law Kelly gave me, which she had herself been given from other people. She handed me this piece of clothing saying, 'I haven't a clue even what this is!'. Turns out it was a sort of waistcoat with a hood, made from grey jersey fabric. The only problem was...well...everything about it. It was a weird drape-y thing that made me look like a big bug. I'm not even joking.


Bzzzz....
After much head scratching I decided that the only thing to do with this thing was to remove everything I didn't like. I couldn't just take it in to make a fitted waistcoat because of the way it was made, and my other idea, to make it into a skirt, wouldn't have worked either. Hmmm. I was going to have to get creative.

First I unpicked the front from the neckline, removing the hood at the same time.


Next, I spread it out on the floor and trimmed off some of the bottom to make the panels narrower.


Then I stitched up edges together to make a tube, making sure to insert the hood back in first. Can you see where I'm going with this yet? The last thing was to turn the tube right way round and stitch the ends together. I used a normal straight stitch for this, and then went back over it with a decorative stitch in a contrasting colour.


Et voila! Hood snood! Not my best work, and I'm not sure I'll wear it, but at least its better than the bug costume.

Wednesday 20 January 2016

Party dress to flapper skirt

It's no secret that I love vintage styling. That little red number a few posts back probably gave it away. So when I saw this lacy black dress in my local charity shop I snapped it up.

Not particularly flattering at this point
I was thinking it was a bit 80s prom dress, and that with a bit of taking in around the waist I could make it look good with minimal effort. However, once I tried it on I noticed how short it actually was underneath that gauzy layer. Now, I have nothing against short skirts, I just don't like them on me. I don't have a problem with my legs, I'm just always a bit conscious that my (probably very embarrassing) underwear might be on show. I'd rather be comfortable in what I'm wearing. You can't see it very well from this photo but the dress was also a bit transparent, especially around the bodice. Not good. I liked the floatiness of the skirt a lot, so I decided to keep that and turn it into something I'd actually wear.

First step: get rid of the weird applique thing on the bust. It looked as though it had been snipped off a big roll, and they had just cut it straight across and stick a load of beads on it. Odd.

Goodbye sad lacy thing, until next time
Next, I pinned the outer layer to the lining in order to avoid any unfortunate chopping disasters and marked up where I wanted to cut it (I'd obviously measured it beforehand - I just undid the side zip and slid the whole thing down until it was the length I wanted it). At this point I noticed that the side zip was completely in the way of my cut, so I unpicked it from the seam.

Don't worry, I'll use zippy again someday

My chalk really didnt like this fabric...
Once it was all marked up (not forgetting seam allowance) I let loose the scissors.

I feel as though there should be a magician involved.
Next I stitched up that side seam where I'd removed the zip, turned over the top a couple of times and ran a line of zigzag stitching around the waistline - the fabric has a little bit of stretch which I didn't want to lose by using a straight stitch. Having taken the zip out I had to be sure not to make it too tight, otherwise I'd never get it over my hips/head.

The end result is really nice. It feels quite 20s with the floaty panels in the skirt, and the length is just below the knee. I teamed it with a loose sailor blouse and a chanel-style cardigan, along with some T-bar shoes.


Miss Fisher eat your heart out!

I need to sort out the lighting in my kitchen for taking photos, but you get the jist. The sad party dress is now living a fun second life as a jazz-age style floaty skirt which is far too long to show off my pants to anyone! Whoop!

Monday 11 January 2016

Dressing gown to kimono blouse

A while ago I bought this cotton dressing gown from Marks and Spencer:

Bland, no? And yes, that is a dog nose near my slippered feet.
I wanted a cool dressing gown for summer, and I had a M&S voucher. This was the only one I could find that I liked. You can't see it from this picture but it has a nice floral-type pattern, although I'm not particularly keen on the mocha colour. I'm not sure I ever was, but I think I convinced myself it was OK. However, I ended up never wearing it regardless of the colour because summer is generally too warm for a dressing gown anyway. So, I decided to make it a bit more interesting...

I started with a pack of Dylon fabric dye for hand use in Tulip Red. This garment isn't remotely delicate, being make of 100% cotton, but for a single lightweight garment I find that hand dye is more cost-efficient (cheaper to buy, one washing machine cycle rather than three). It does involve standing and stirring for an hour, but stick me a TV programme on that I like and I don't mind too much.

The dye took beautifully and I was left with a nice, de-blanded dressing gown. It was way too long to be worn as day wear as it was though, so I measured from the hem to where I wanted it to sit and chopped off the bottom.

Pretty colour!

Typically I measured a bit wonkily and chopped off more than I intended to. Oops. Never fear though, it was still long enough to make a blouse, just not as long of one as I'd planned. I hemmed the bottom of the gown up and ran a line of stitches down it. Then I unpicked the right hand belt loop from the side seam and stitched the seam back up.

Belt loop be gone!
I chopped off the ribbons from inside the waist that are meant to hold the gown closed (but in reality nobody ever uses, do they?).

Goodbye useless ribbons! It's been fun. 
Last but not least I measured the height of the remaining belt loop from the hem and added a big button in a contrasting colour to the opposite side, so that I can use the belt loop as a buttonhole to keep the blouse closed. 

It's bigger than it looks, honest.

The blouse is wearable as it is in this state, although it is loose around the waist. I want a certain amount of looseness around the hips and bust so that it billows a bit, but in order to draw it in at the waist it needed a belt. I had a black elasticated waist belt I could have used (and probably will for a casual look), but I wanted something a bit dressier so I googled a few youtube videos and webpages and made myself a quick obi belt (quite impressive for someone who never makes things from scratch!). It anyone is interested I'll put a post up soon of how I did it, but its very easy.

Tah-da! Please forgive the backdrop, our house is far too tiny to have any useful blank stretches of wall.
I think this will look much nicer with long hair tied back, but I'll have to wait a while for that! In the meantime I think it looks none too shabby. The colour is a vast improvement and it feels quite glamorous. It's also very comfortable, which in my world is extremely important!

Wednesday 6 January 2016

Band tee to vest top

Back in 2007 I went to Leeds Festival for the second time. I'd just finished my undergraduate degree and split up with a long-term boyfriend, so I had a great time! While I was there I bought a Red Hot Chili Peppers T-shirt. I loved the design, but as usual the smallest size was still too big. I bought it anyway, as you do. Unfortunately the neck line was quite tight, and as I don't really like tight things around my neck I ended up avoiding wearing it. After a while it became consigned to the work wear pile (I work outdoors), and it ended up a bit stretched with deodorant stains on the armpits (classy).

Not my best angle...


I decided I didn't want to get rid of the T-shirt, because I really do like the design and I love the Chili Peppers, so I decided to get rid of the bits I didn't like and make it into a vest top. I started with the collar. It was far too high and I felt as though I was being strangled every time I put it on. I cut away the heavy edging and deepened the neckline on both front and back, to just above the top of the print. Next I unpicked the sleeves. 

Better already!

I measured myself, then turned the top inside out and marked how far I wanted to take it in. I wanted it to fit my shape better than it currently did, so I added a bit of shape too. 


I stitched a line of stretch overcasting down each side and trimmed off the excess. I didn't have any thread the right shade of red, so I used a contrasting dark grey to match the print. Then I turned over the raw edges of the neckline and sleeve holes and stitched them down. The result is a much-improved lightweight vest top, with a much less strangly neckline!


 ta-dah! 

Perfect for summer! Shame it's January really. Oh well!

Friday 1 January 2016

Red sailor dress to cute wiggle dress

About a year ago I spotted a dress on eBay that I really liked. It was by Collectif, a vintage-inspired brand I absolutely love because it makes size 6 clothing (you'd be surprised how many vintage reproduction brands don't, let alone high-street brands) and the clothes look nice on my frame. Being on the skinny side but with an hourglass shape rather than a boyish shape, I find that a lot of clothing my size doesn't drape very well. Unfortunately Collectif doesn't have any shops in my neck of the woods, so I have to buy online. Finding a new but unworn dress on eBay was like Christmas - new Collectif but at half the price! Unfortunately at this point I wasn't documenting my refashions so I didn't get a picture, but rest assured it looked like this:

Image source: www.collectif.co.uk


The dress arrived, and it was beautiful! I was chuffed. I always wash clothes before I wear them, so I checked the washing instructions and stuck it in the washing machine (on its own, as it was red and regardless of what is coming next, I'm not entirely stupid). However, when I pulled it out of the machine I almost cried. The lovely white trim on my beautiful dress was now (you've guessed it) a rather revolting shade of pink. I must admit I was also a bit confused. The dress is a cotton/elastane mix, which doesn't take dye very well, so it was a bit odd that the white had turned quite so pink. The colour combination of red and pink was really quite nauseating, but I thought that, as it had taken the red dye, maybe the whole dress would dye. I picked a nice dark navy colour and gave it a go, which was a waste of time because the dress stayed exactly the same pink/red combination as before.

I was getting a bit frustrated at this point, so I did the only thing I could think of. I unpicked the sailor collar from the main dress, along with the trim at the ends of the sleeves. This left me with a V-necked dress with cap sleeves that was OK, if a bit boring.


Here it is, looking a bit forlorn and shapeless


At that point I got a bit bored of messing around with the dress and put it on my mending pile to work on later.

Fast forward a year to December 2015, when I found the dress on the pile and realised I'd completely forgotten all about it. It was wearable as it was, but it just felt really dull. I decided it needed a bit of a change. I had a metre of printed cotton in my fabric bag which contrasted nicely with the red, so I decided to add some binding to the neckline and sleeves and make a waist belt to break up the colour a bit.

Materials!


I cut a two inch-wide strip of fabric and folded the edges in towards the centre of the strip on the reverse of the fabric. I then folded the fabric in half to create the binding. I also decided to add a floppy bow to the neckline, which I made out of a 1 inch-wide tube of the fabric which I stitched into a bow shape and then hand-stitched onto the dress.

The belt was made by making a tube of fabric the same length as the circumference of my waist (plus seam allowance) which was then turned right-side out and pressed so that the seam was in the centre. I then threaded a length of wide elastic into the tube, which was a little shorter than the circumference of my waist. I stitched the ends of the elastic to the ends of the tube and then stitched the tube closed by hand. This made a tight belt that, when worn, is exactly the right length. I didn't have a suitable clasp for the belt in my sewing box, so for the time being I've just used hooks and eyes.

Reverse view of one of the ends of the belt. 
Not the neatest job, but as you can't see it when its on, I'm not too bothered


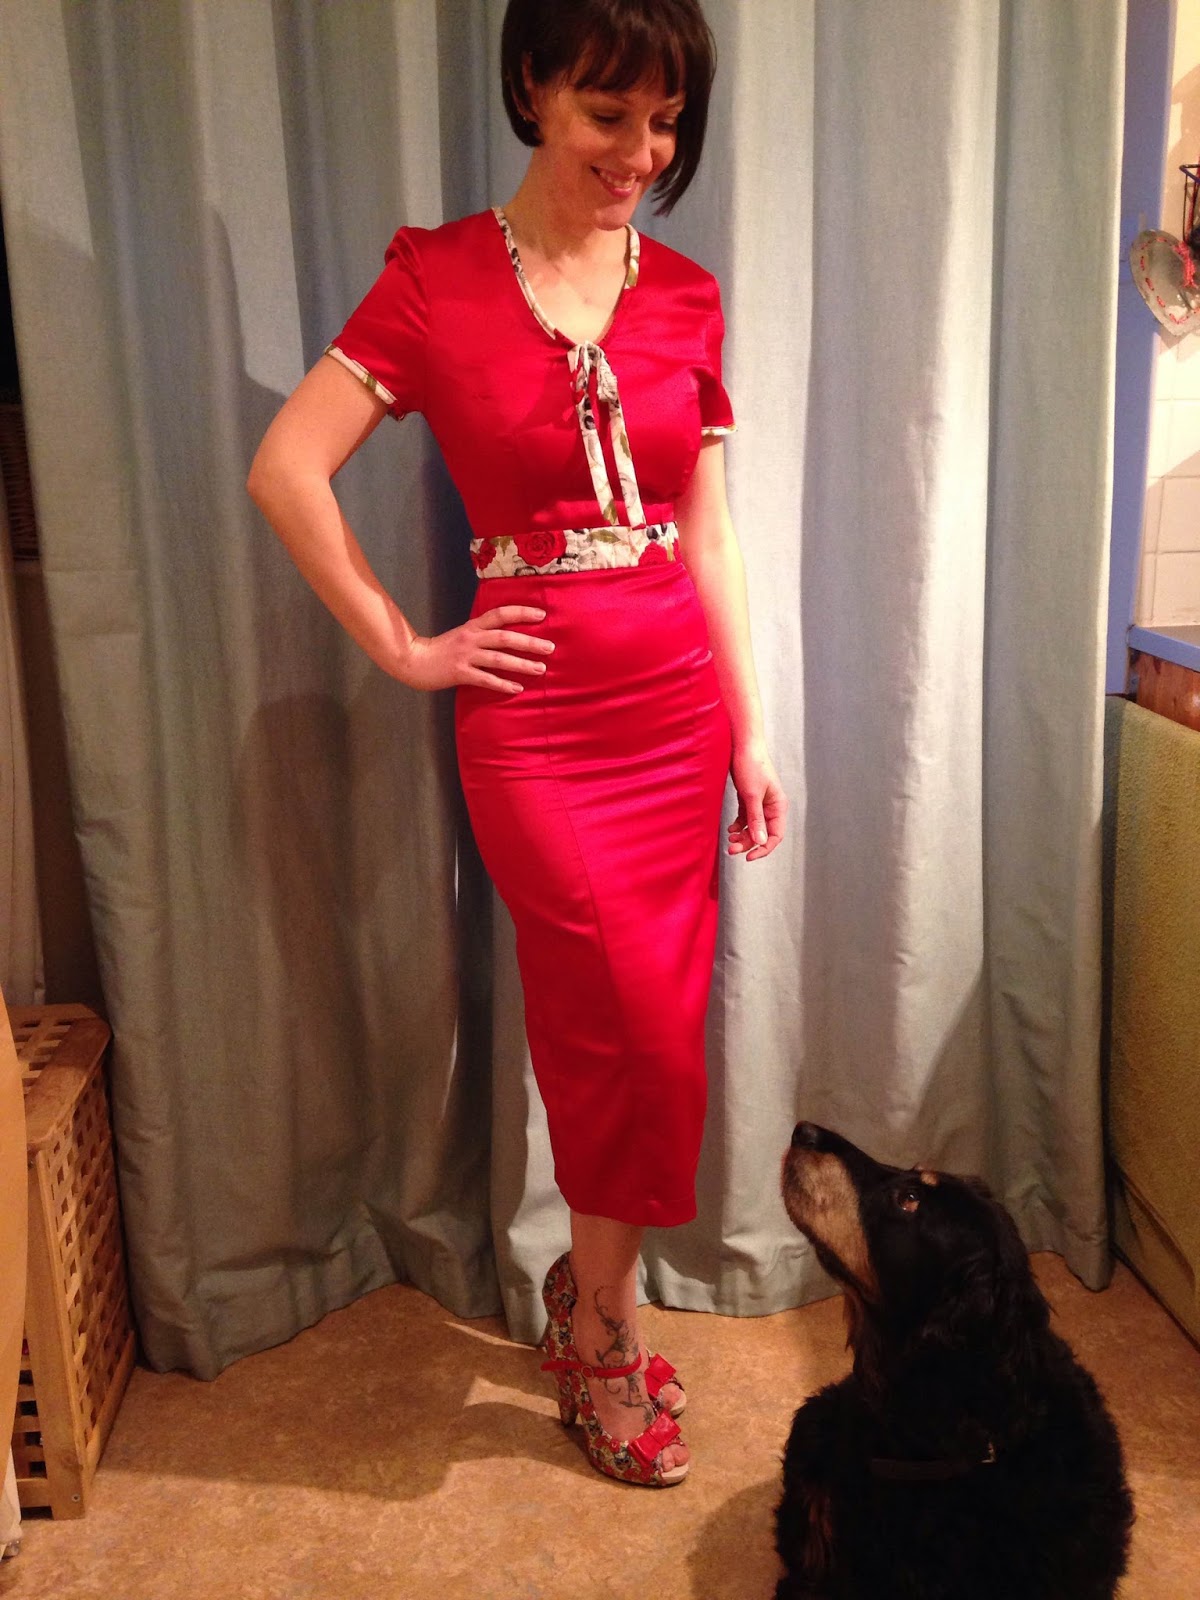
I must admit, I'm quite pleased with the result. I decided to wear it with these beautiful Tuk shoes that Hubby bought me a couple of Christmases ago:

Oooooooooh...


 Et voila!

Not bad, if I do say so myself.


 Sasha agrees...